
The pageless view in Google Docs is a fantastic way to break free from the constraints of printed pages. It allows your content to flow seamlessly, adjusting dynamically to your screen size. However, you might still encounter visual “breaks” or awkward spacing that resemble page breaks, even in this infinite canvas. These aren’t true page breaks in the traditional sense, but rather visual cues or formatting that can disrupt the flow.
Here’s how to identify and address these visual breaks in your Google Docs pageless view:
Understanding Visual Breaks in Pageless
In pageless view, Google Docs eliminates the hard boundaries of pages. So, what you’re seeing that looks like a break is usually one of the following:
- Section Breaks: These are used to apply different formatting to different parts of your document (like columns or headers/footers). They can appear as a thicker line or a noticeable gap.
- Large Empty Paragraphs: Intentional or accidental extra line breaks can create significant white space, mimicking a page break.
- Table Formatting: Tables with a lot of vertical space or placed awkwardly can create visual disruptions.
- Image Spacing: Images with significant padding or margins around them can lead to large gaps.
It’s important to note: You cannot “remove” the concept of a page break entirely in Google Docs, as it’s a fundamental structural element for print and other export formats. However, in pageless view, you can effectively minimize or eliminate the visual appearance of these breaks.
Identifying and Removing Visual Breaks
Here’s a step-by-step guide to tackling those visual interruptions:
1. Identify the Source of the Break:
- Look for thicker lines: These often indicate section breaks.
- Scroll slowly: Notice if the gap is due to multiple empty lines.
- Examine nearby elements: Is there a table or image around the break?
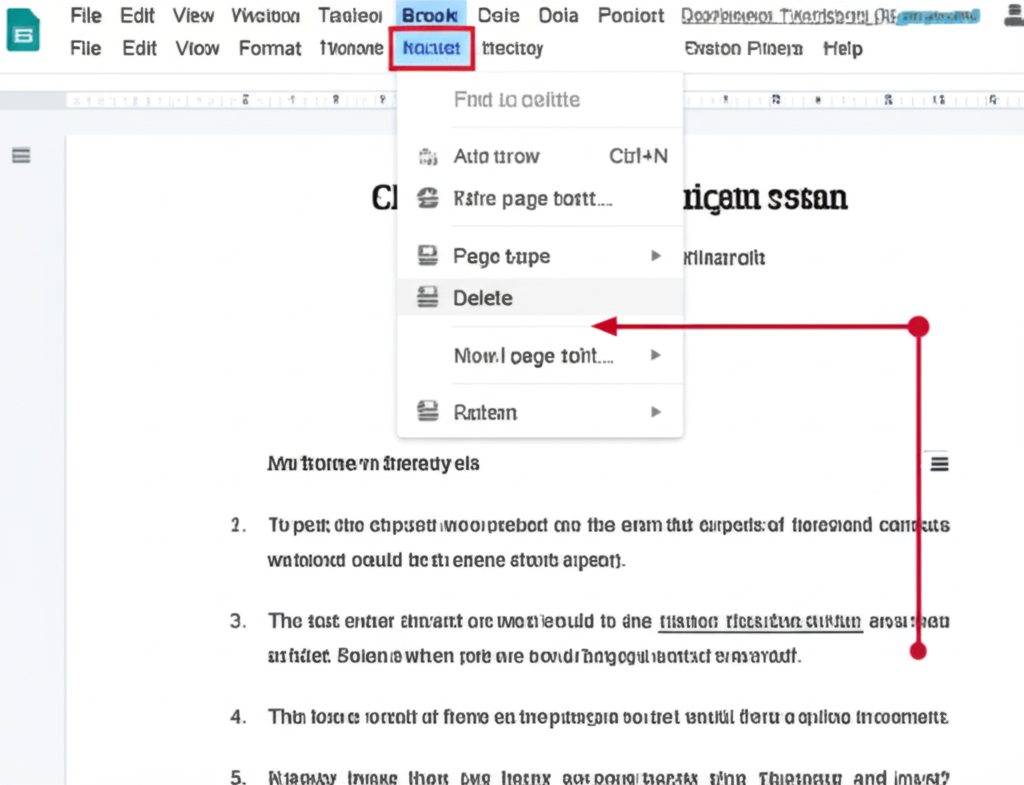
2. Removing Section Breaks:
- Click just before or after the visual break.
- Go to Insert > Break.
- If it’s a “Section break (next page)” or “Section break (continuous),” you should see options to delete it. The exact wording might vary slightly. Click on the break indicator (it might become highlighted when you click nearby) and press the Delete key on your keyboard.
- Alternatively, switch to “Print layout” (File > Page setup > Paper size > Choose a paper size). This will show the actual page breaks. Locate the section break and delete it like regular text (by placing your cursor before it and pressing Delete). Then, switch back to “Pageless.”
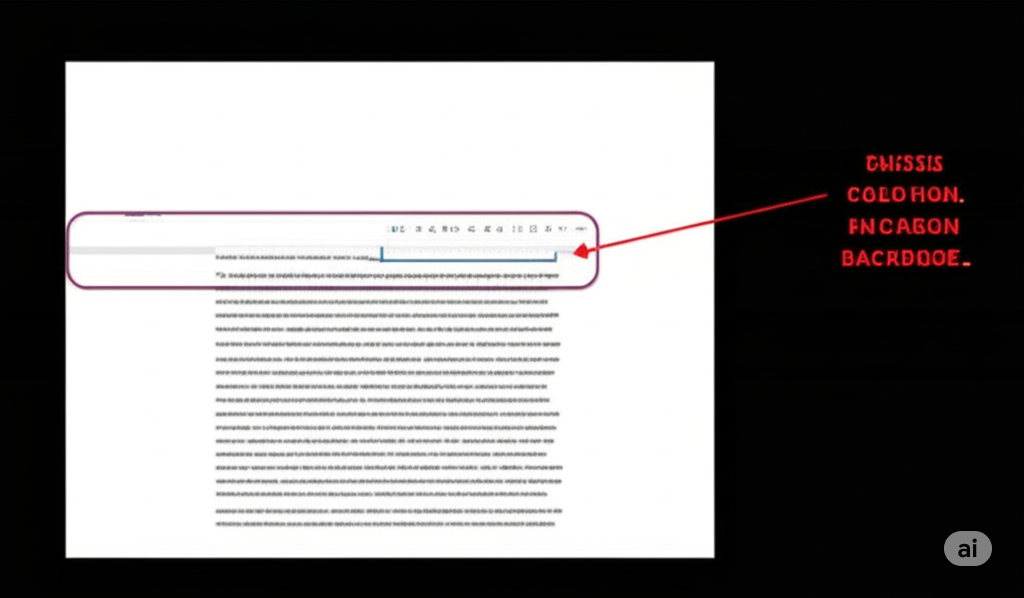
3. Removing Extra Empty Paragraphs:
- Click within the large empty space.
- Look for your cursor blinking far away from the surrounding text. This indicates empty paragraphs (created by pressing Enter multiple times).
- Place your cursor at the beginning of the empty space and press the Backspace or Delete key repeatedly until the space is gone and the text flows normally.
4. Adjusting Table Formatting:
- Click on the table.
- Look for any large gaps above or below the table. These might be due to empty paragraphs before or after. Remove them as described above.
- Adjust row heights: Hover over the bottom border of a row until you see a double-sided arrow, then drag to reduce extra vertical space.
- Check table properties: Right-click on the table and select “Table properties.” Review the “Cell padding” and “Border spacing” settings to ensure they aren’t adding unnecessary space.
5. Adjusting Image Spacing:
- Click on the image.
- Look for extra space above or below. This could be due to empty paragraphs. Remove them.
- Adjust image margins: Click on the image, and in the toolbar that appears, look for the “More options” (…) menu. Select “Image options.” In the sidebar, under “Text wrapping,” you can adjust the “Margin” settings to reduce the white space around the image.
Embracing the Flow
By understanding the common causes of visual breaks in pageless view and using these simple steps, you can create a more seamless and enjoyable reading and writing experience in Google Docs. Embrace the infinite canvas!
